

Before we even started building our home I knew I wanted this style of Range Hood. I saw it on JennaSue Designs blog and I fell in love. Thank goodness my dear husband was up for it. (He usually is!) I will show you how exactly we build it in this blog post! I won’t include exact measurements because that will depend on your space and oven size, but I will explain all the steps to the best of my abilities.
First things first, we knew we wanted this type if range hood before we started building, so the spot was prepped with the proper plumbing. Then we purchased this insert on amazon and went from there.
Here is an approximate supply list, this can vary with different size range hoods.
Supply list
- 5 2x4s
- 1 2×6
- 1 sheet OSB
- 1/2″ drywall
- 1/4″ drywall
- Screws (wood & drywall)
- Flexible and regular corner beads
- Mud
- Paint
- 3M Spray Glue
Step 1: Framing the range hood
First thing we did was measure out our space. How wide did we want it? Where do we want the curving to start? Make a rough sketch with all your measurements. Then build your skeleton, starting with these upside down Ls.


Then we built the frame for our range hood insert from 2X4s. We sat the frame on the Ls, and attached them with screws. It is important to mention that proper screws should be used, and also that it is attached to studs in the wall. You don’t want this thing coming down on you! Next we attached 2X6 around the frame because that was how high we wanted the front border to be before it starts curving inwards. (I hope that makes sense.)
Step 2: Preparing the sides
Next up are the sides. I’ll be honest I was nervous about this step! I sketched out the sides on cardboard first. Basically making a template of exactly how we wanted them. I wish I would have taken more photos to show you! After sketching them we cut them out, traced them on OSB and cut them out of the OSB. Then we attached the sides to our already partially framed range hood.

Step 3: Framing the top
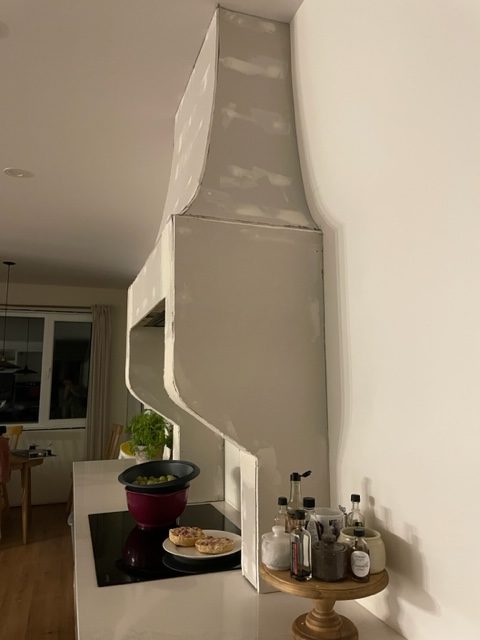
Alright, next step was dry fitting the insert and building the top frame around it. It was similar to step two. First sketching out the curve you want and then tracing on to OSB and cutting it six times this time! Then you want to cut 2×4 pieces to insert between two of the cut pieces. Repeat this twice! (See picture below.) Now is the time to make sure the insert is properly installed, because once we move on to the next step you won’t be able to remove it again. Once that is all good and done you will have to cut more 2×6 pieces and again insert between the last two cut OSB pieces. Then attach to front. Now your frame is ready!


Step 5: Drywalling
This step should be pretty simple in compared to the others. We used regular 1/2 inch drywall for the bottom half, and flexible 1/4 drywall for the top. Don’t try to make 1/2 inch work for the top, we tried that, trust me it won’t work out! Attach all the drywall with drywall screws!

Step 6: Mudding, then mudding, and mudding again!
This step probably was the one that dragged the most. It will need a few layers of mud and each layer needs to properly dry before starting the next! Don’t skip the drying time! We started with the obvious spots that needed filling and went from there. During the first layer we also started adding flexible corner beads to the edges to get them perfect. They are easier applied with a 3M spray glue. Then keep mudding over any spots that needed it.

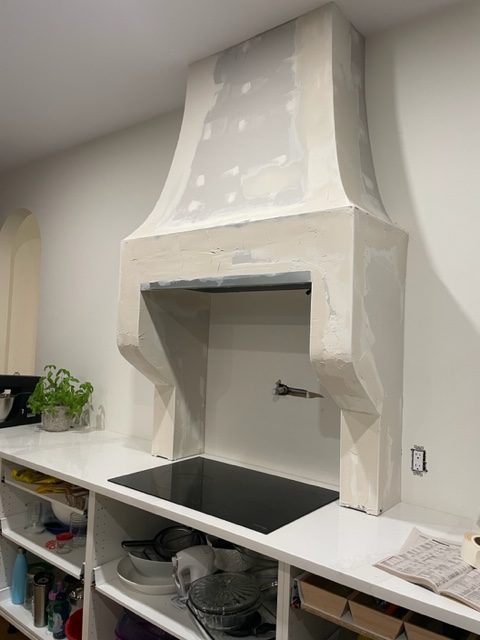
Step 7: Sanding and painting
This step was the fun and messy part! Now it’s time to sand and smooth it out. It is very likely that you will have to come back with more mud and fix little spots here and there. Keep repeating this process until its smooth and pretty much perfect and ready to go for painting. Then it’s time to paint! We wanted it to match our wall colour so we went with simply white by Benjamin Moore. Last step which is also optional, but probably a good idea, is to clear coat the inside of the hood so it is easy to wipe down and keep clean.


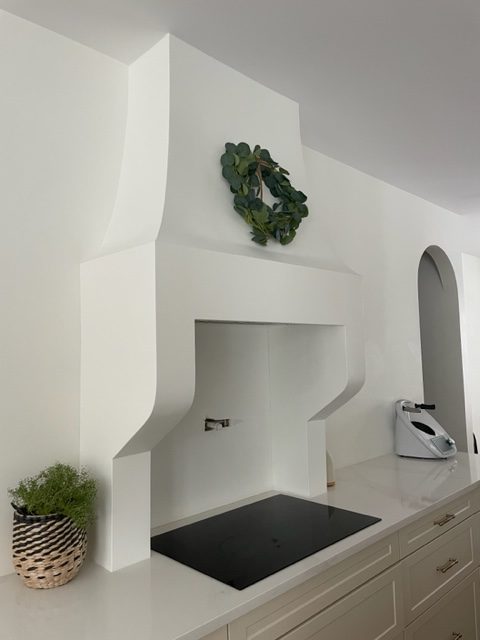


And there you have it! Next up will be floating shelves and pendants lights over our island. Subscribe to this blog to keep up with all of our upcoming projects!
I hope this blog post was helpful to you!
love, Inez
(This blog post contains affiliate links which I make a small commission off of)
3 thoughts on “7 Step Guide on how to build our DIY Range Hood”
Comments are closed.