If you want a huge impact with a very low cost and not too much effort then a panel wall is for you! We got this project done within hours and didn’t need to many supplies!

We moved into our home almost a year ago now. Our master bedroom really wasn’t much to look at. White walls, our bed and nightstands. I was craving character, and dare I say it, colour! I always had a thing for green. To me green feels calming, soothing and alive all at the same time. Imagine yourself in a forest, surrounded by pine trees. Take in that smell, the calmness, the peaceful energy. I know I’m a bit dramatic, but that is what green does to me. Anyway, moving on, I asked my husband Thomas what the best and most efficient way to build this wainscotted wall is, and of course he knew within minutes.
Supply List for Panel Wall
- 2 1/2″ mdf casing
- LePage Polyfilla
- White Latex Caulking
- Finishing nailer with 18 gauge nails
- Paint
Measuring your wall
First thing we did is decide how far apart we wanted the panels to be. We decided on 30 inches between the boards. Furthermore how high we wanted the wainscotting to be. We decided on 81 inches for height. There is no right or wrong way to do this. Whatever look you prefer!

Cutting panels
The next step is cutting the casings to size. Remember however high you want the wainscotting to go you will need to subtract 2 1/2 inches, because that is the width of the board that will go across horizontally. Once all the boards are cut you are then ready to start nailing!
Nailing Panels to the wall
We used a finishing nailer with 18 gauge nails to nail the boards to the wall. We used a level to make sure they are straight and then nailed the board a few times throughout. Once the vertical boards were a-fixed to the wall we nailed the horizontal board on top. The top board were two pieces because one piece wasn’t long enough.

Filling nail holes with filler
This step is pretty simple! All those little holes that were made with the nailer need to be filled otherwise they will be very noticeable once painted. I just applied the fill with my finger. Easy peasy.
Caulking
The next step is really satisfying! All the seams where the panel touches the wall and cracks in between boards need to be filled with an acrylic caulking. This will make the wall look seamless, professional and like it was aways meant to be that way after painting. Thomas applied the caulking with a silicone gun and smoothed it out with his finger. Another great hack is to smooth it out with a wipe, leaving your hands clean. I’m sure there are other ways you can do that if that doesn’t work for you.
Painting
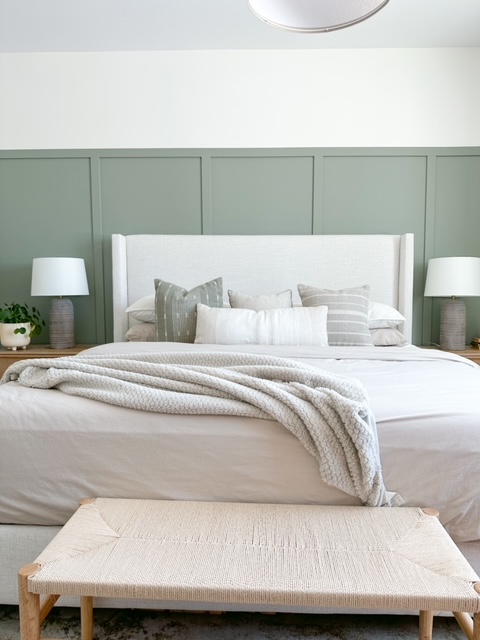
Finally this is when it all comes together. Once you have your chosen colour there is nothing else to do, other than to get painting! We went with the colour Evergreen Fog by Sherwin Williams. I applied one coat, waited until that was completely dry and then applied the second coat. And that was it. Then finally our wall was finished!

It looks much better in person than on the photos, I just can’t believe the difference it makes in our room. It feels like a completely different space! I love the contrast of our bed to wall. If you want to add character to a room then this is the way to go!


Let me know in the comments below if this was helpful to you, or if you have any questions for me!
love, Inez
Keep up with other other home projects:
If you want to see how we wallpapered our powder bath click here!
Learn more about our DIY range hood here!