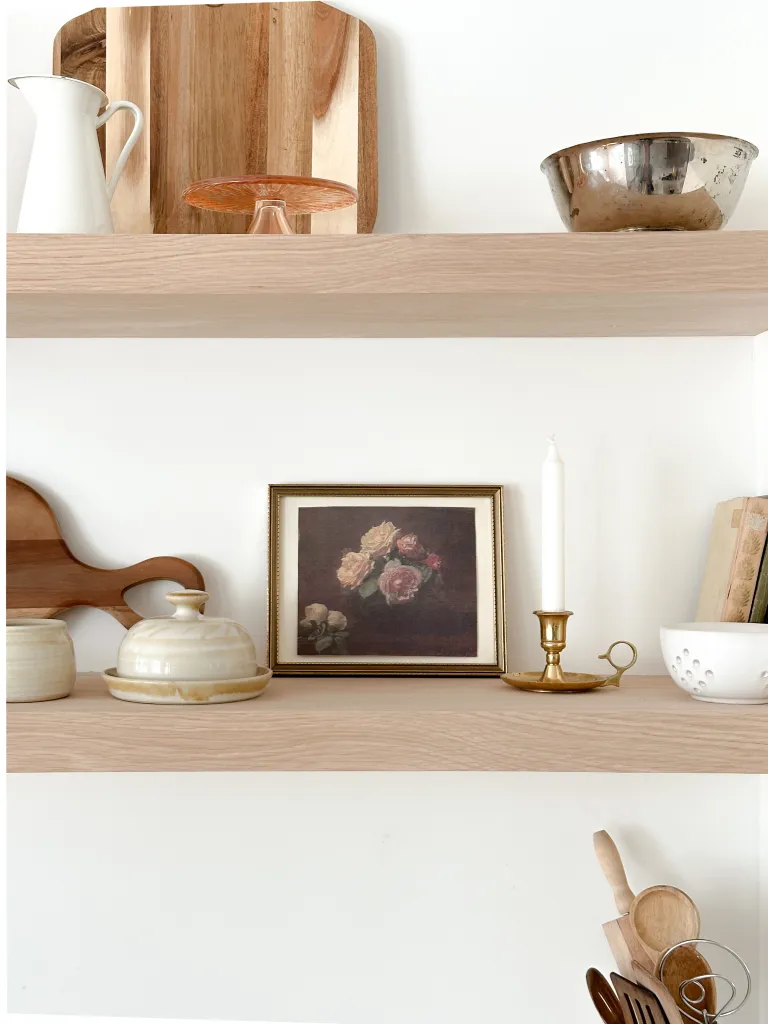

When we planned our house and our kitchen I always loved the idea of floating shelves, and I absolutely loved the idea of white oak shelves.
When I designed our kitchen I opted to not have upper cabinets and leave that space open for floating shelves. I figured this would make things seem more open, and it would give it that feel of a vintage European kitchen, where often they wouldn’t have upper cabinets.
We have a butlers pantry with lots of storage so I figured this would we ok.
White oak and floating shelves are totally trending right now but I think it will stick around for a while. The warm wood looks stunning with a white or cream, and it doesn’t have an orange tinge. That was important to me!
Trend or not I was in love with the look, and wanted to make them happen! We had the perfect spot in our kitchen on either side of our range hood.
You can read how we build our custom range hood here!

When we started looking for someone to make them for us we realized they were easy $300-$500 for EACH shelf, and we needed four! So that option quickly flew out the window. Our next choice was building them ourselves.
We started looking for solid oak wood. However we quickly realized that oak wood was almost impossible to source. Eventually when we did find it we saw it was almost the same price as buying them already made. One slab would cost us $200, and that would be enough for 1 shelf.
So back to the drawing board we went. I was really set on the look of white oak shelves! My brilliant husband came up with he idea of making them out of plywood and then using a white oak veneer to finish them with! It was cost efficient and we would get the look we wanted, so to work we went!
What we needed
- 4×8 3/4″ birch plywood
- 18 gage finishing nailer
- carpenter clamps
- wood glue
- white oak veneer
- 3M spray adhesive
- table saw
- palm sander
Step 1
First things first we used the table saw to cut 2 plywood pieces 12″ deep x 52″ long, that is the size we needed for our space. Next we cute 1″ wide strips out of the same plywood, the same lengths.
Next with glue we attached the “strip” on the edges of the first piece, and then glued the next piece on top, kind of like a sandwich! Then we also used our fishing nailer along the edge to secure the whole thing even more.
Now the sides and front looked like a solid piece but the inside was hollow. Next we used the clamps to hold it all together and let them dry overnight.

Step 2
After the glue was properly dried it was time for the veneer. We cut out veneer pieces same size as our shelf top and sides.
Then we used the 3M spray adhesive and sprayed the bottom side of the veneer and also one side of the shelf. Then lay the veneer on top and smooth it out with your hands to make sure there are no air bubbles and its all adhered.
First we only did one side of the shelf, layered them all on top of each other and clamped them together, to make sure they properly and evenly dry. The following day we did the bottom of the shelf, and the day after the sides! This made sure that everything was drying properly and it made it easier to work neatly!


Step 3
Once all the veneer was on we sanded the edges to make them smooth! And that was basically it folks! The shelves were ready, now the only thing left to do was build brackets and attach them to the wall.
Attach the brackets into the studs! This is very important that the shelves will be secure and endure some weight. Once the brackets are on, you can slide your shelves onto the brackets.
We also screwed our shelves into our range hood to make them even more secure!
What do you think? Did we succeed in making dupe white oak shelving? They ended up costing us 1/4 of the price if we would have bought them pre made, or we used real oak wood. I’m so happy about the outcome!!


love,
Inez