
Hi friends! A while back I acquired a cabinet on Facebook marketplace. She was just so cute I couldn’t pass her by, and so I made my husband pick her up on his way home.
I wasn’t sure what I was going to do with her, I was thinking of sanding her and giving it a natural finish. After some examination I realized I didn’t like pine knots and so we tucked her away and I honestly forgot about her. Fast forward one year and a move later it was finally time to give this beauty a glow up.

Step one
First things first she needed a good cleaning. After that was done I gave her a light sanding with a 120 grid sandpaper.
Next up all the paned windows needed to be taped, for which I used regular painters tape. This was probably the most tedious task! It felt like a whole eternity but after that was done I was ready to get painting! Now technically at this point a coat of primer would be ideal, but I didn’t have any primer or patience so I just went for it.

Step two
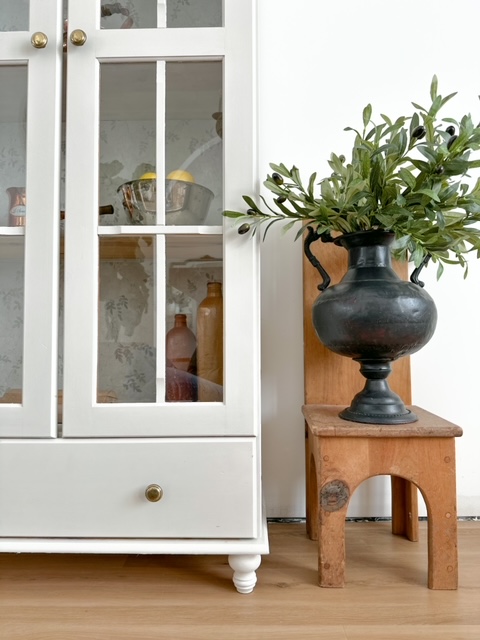
We had a bunch of 1 quart paint samples left over from when we painted our house. I wanted to use one of them because I didn’t want to spend a lot on this flip. I decided on Edgecomb Gray which is a beautiful Greige colour. It took two good coats to get this cabinet covered.

Step three
We had just wallpapered our guest bathroom (you can read about here) and so we had some wallpaper scraps left over. I decided to use them on the back panel of the cabinet to make it even more feminine and elegant since it was probably going to go in my daughters room. With some wallpaper adhesive this was a quick and fairly simple step.

Step four
Now that the painting was done, she was ready for the finishing touches.
I really wanted to add even more character to this cabinet and so I ordered these adorable wooden feet off amazon.
I painted them the same colour and we attached them to the bottom. I also wanted different hardware and so decided to use some beautiful brass knobs that I had thrifted. They have a gorgeous natural patina and I thought they would go perfect with this cabinet.
Last but not least I gave it a coat of water based varathane to seal the paint.
Finally she was done and ready! Before she went into my daughters room we staged her and snapped some shots. I hope you love her as much as we do!


That is all for today friends, hopefully this post inspired you to give an old piece some new life again!
love, Inez
*This post contains affiliate links.*